Create Miles
In order to consume miles, it is first required that the contract's admin account provides your user account with some new miles. To do so, it is necessary to invoke the add entry point of the smart contract.
In a real production situation, miles are created by the DApp's off-chain server which creates miles according to user activity.
In this DApp example, the off-chain server is not provided and the creation operation is done manually by invoking the smart contract's add entry point. To do so, it is necessary to import the contract's admin account in the Thanos wallet as explained below.
Import the smart contract's admin account
The process to is two-steps:
- download the admin faucet file (instructions)
- import it in wallet (instructions)
It is suggested that you name that account "Admin" for ease of use.
Provide you with new miles
add entry point
The addentry point to create miles and associate to a user address is presented in this section.
It takes 4 parameters:
| Parameter | Value | Description |
|---|---|---|
| ow | USER_ADDRESS | address of the created miles' owner |
| newmile_id | USER_ADDRESS + "_0" | a unique for the created miles |
| newmile_amount | 20 | number of miles to create |
| newmile_expiration | TOMORROW | date beyond which miles are expired, for example '2021-06-28' |
where:
- USER_ADDRESS is replaced by the DApp user account to receive the miles
- TOMORROW is replaced by a date in the future, for example tomorrow
This entry point may only be called by the contract's admin account. If you have not registered the admin address in the wallet, go to the section above.
Miles creation transaction
The smart contract is available at the following address:
KT1XpM1f6cq8cy8m8WV9xSsE5nBix2DzTYmx
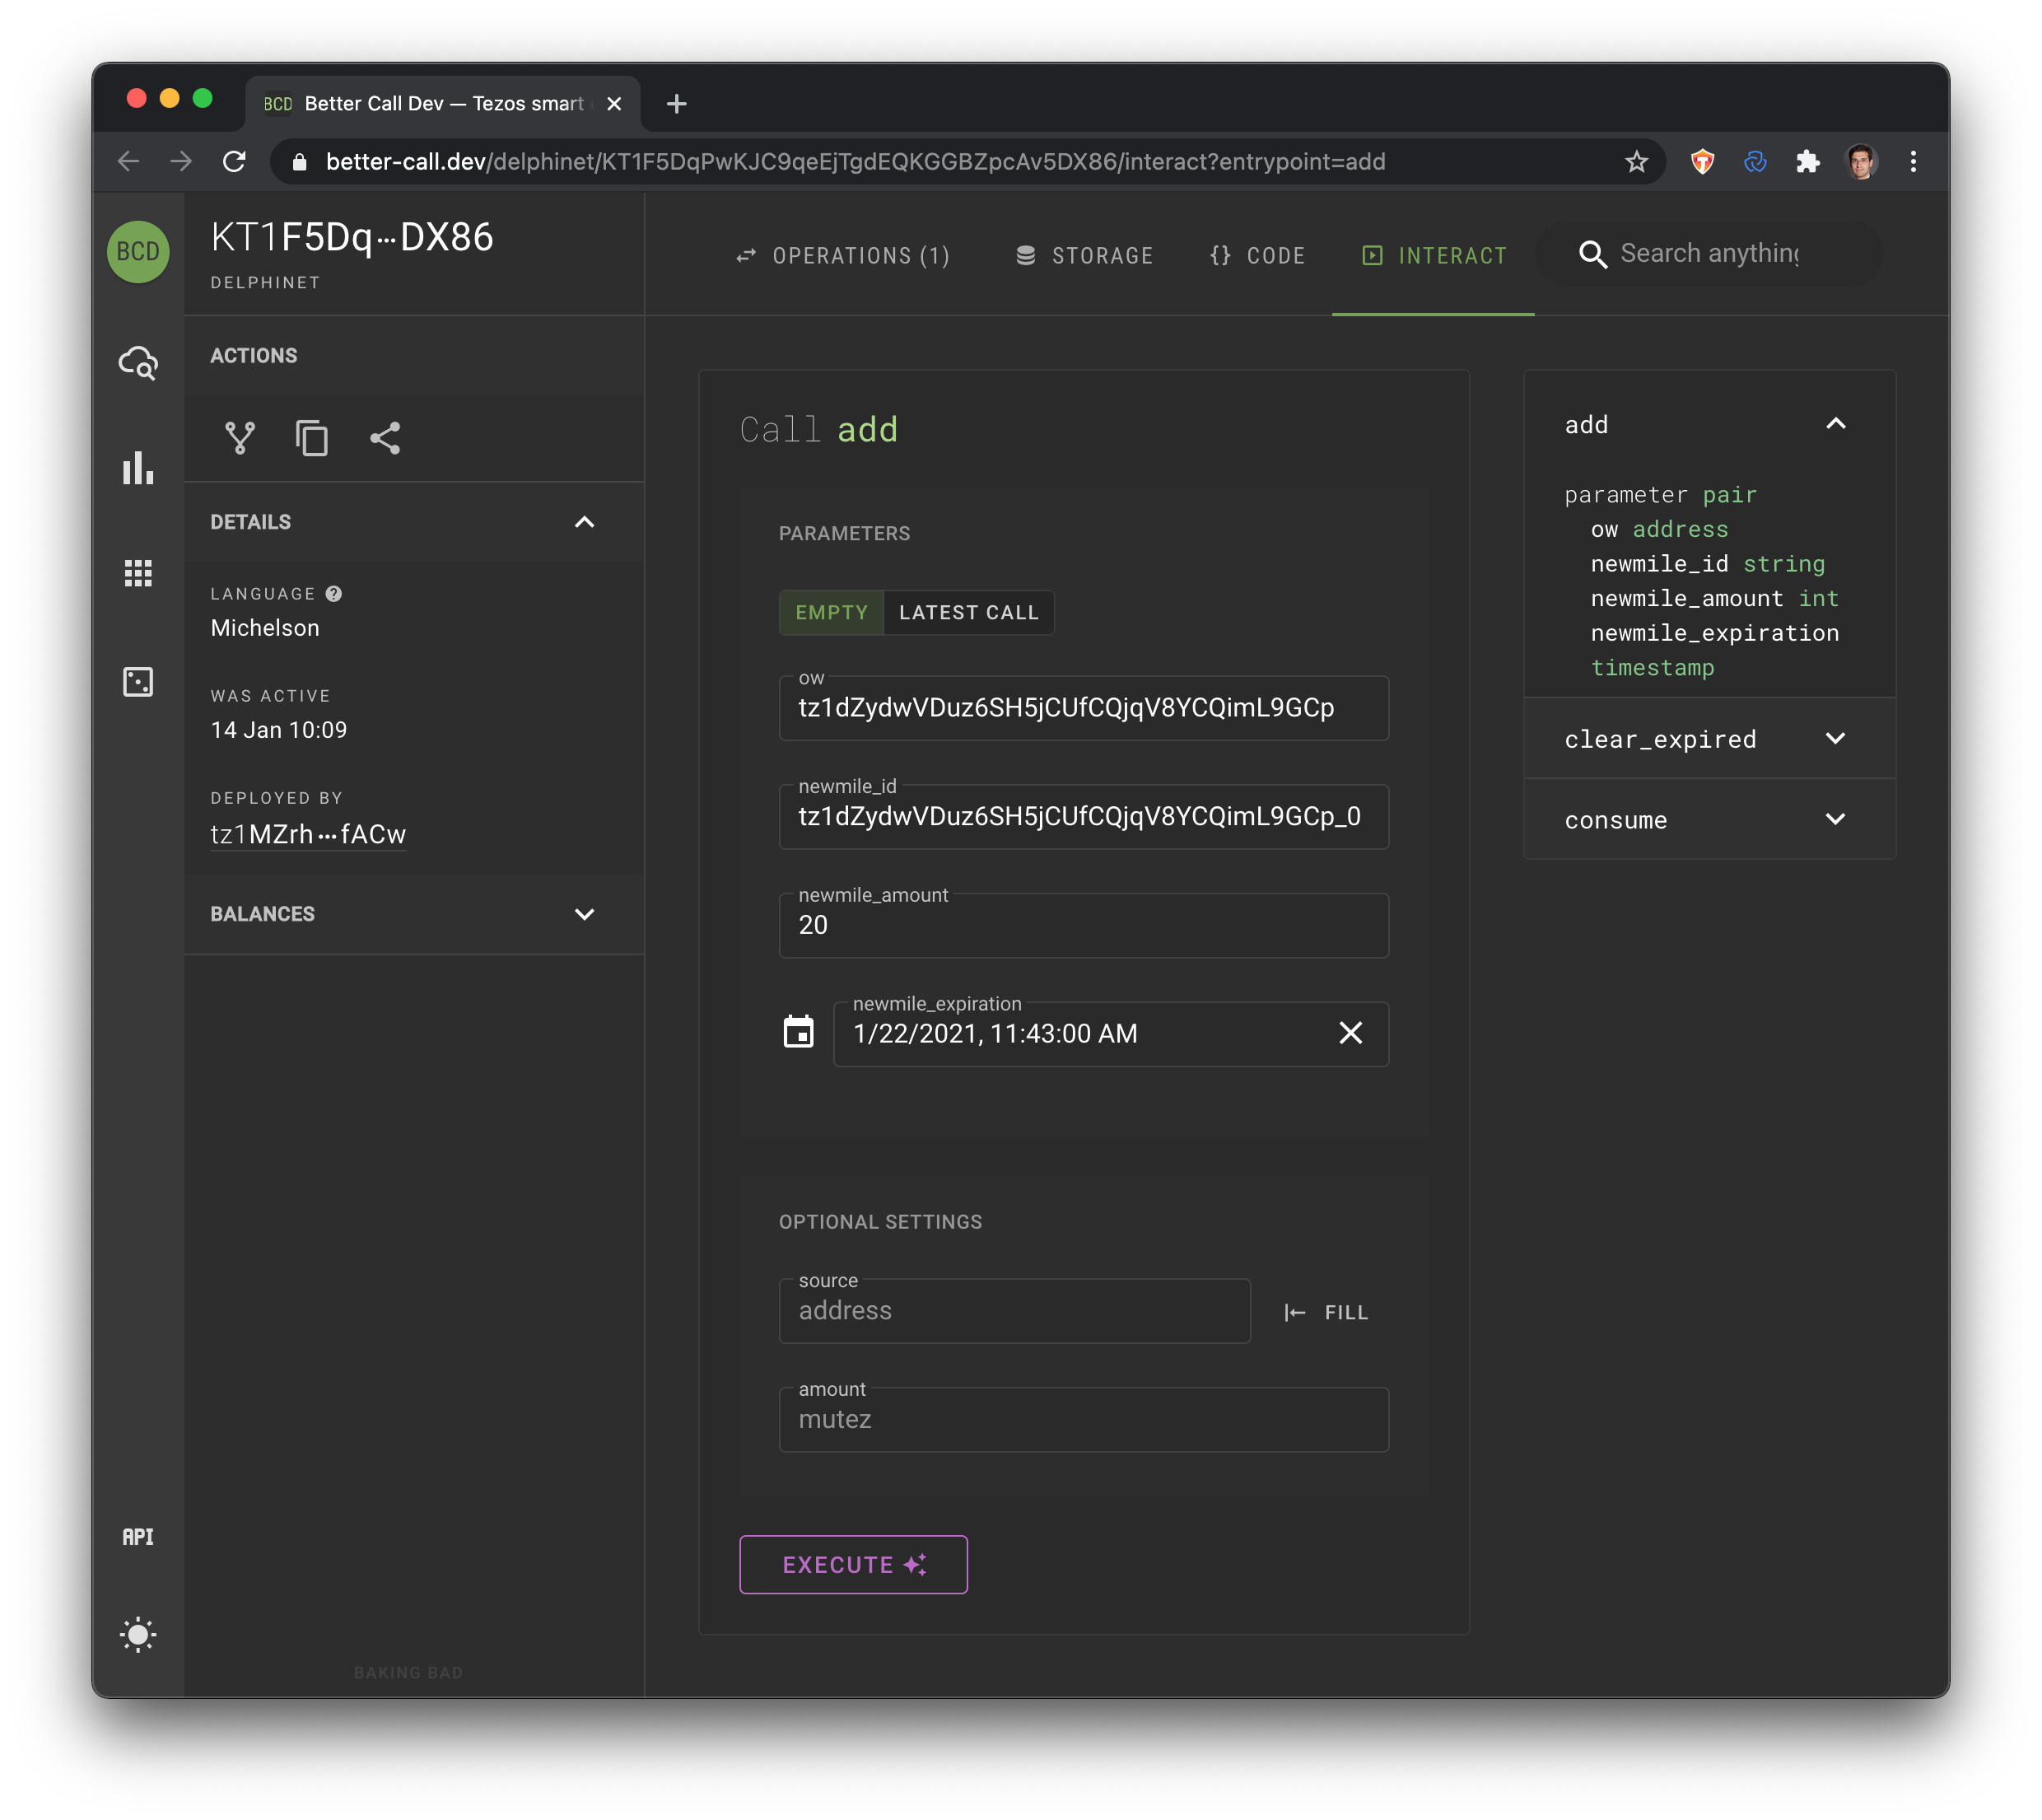
This section presents how to invoke the add entry point with the smart contract indexer Better Call Dev. Click the button blow to open the smart contract:
Click on the "Interact" tab and enter the parameters as presented above.
Below is an example screenshot (with USER_ADDRESS set to tz1dZydwVDuz6SH5jCUfCQjqV8YCQimL9GCp) of the interact panel:
Once settings are set, click on the "Execute" button and select "Thanos":
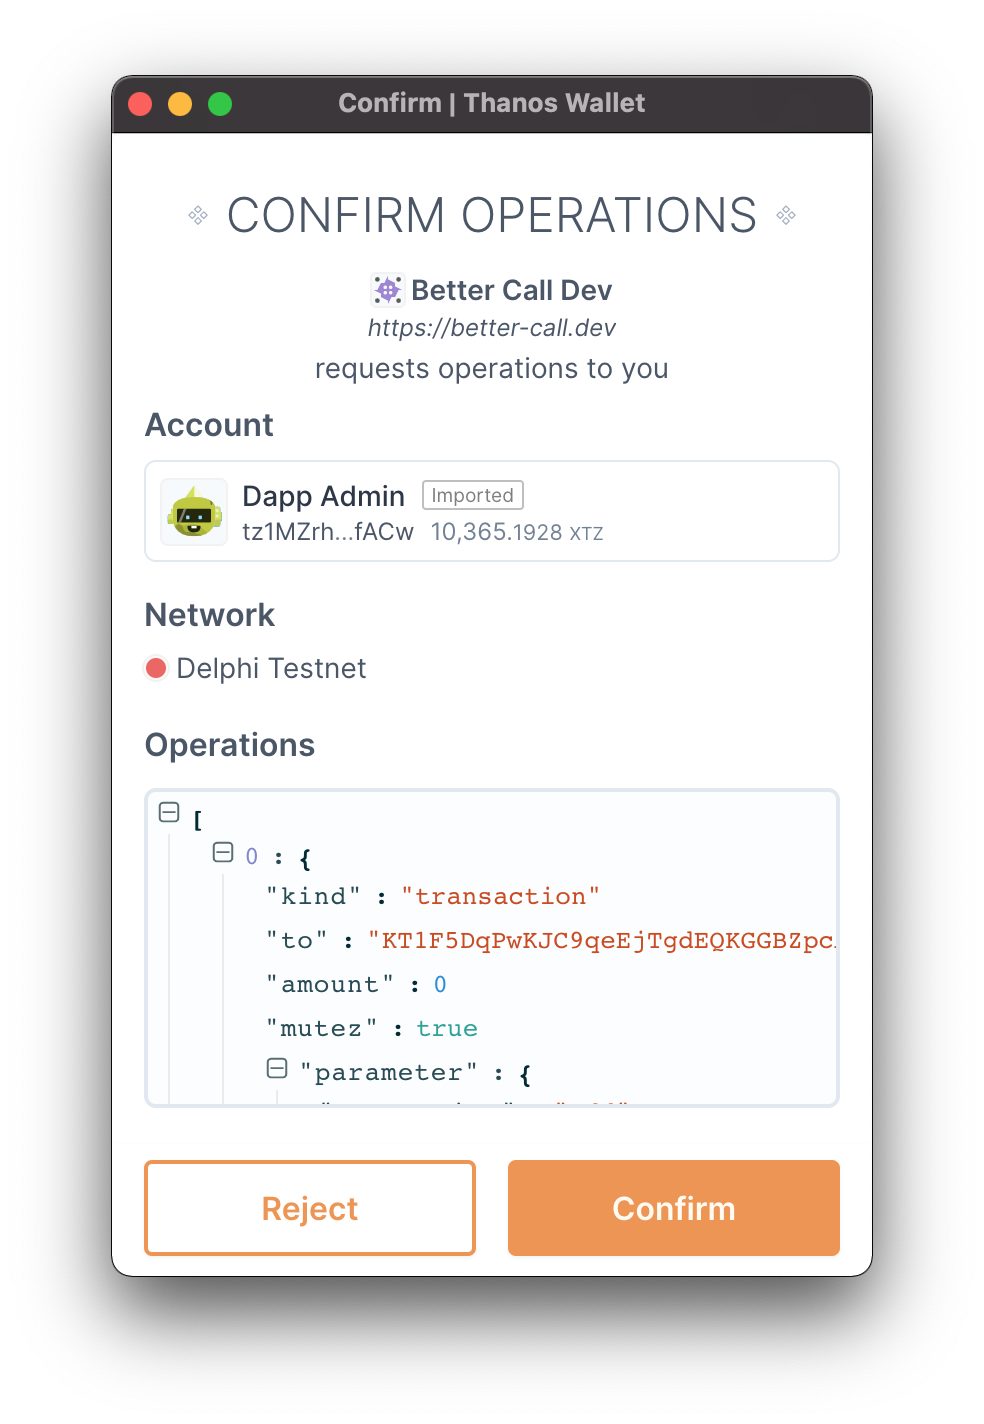
You may check the transation parameters in the "Operations" section:
[
    {
        "kind":"transaction",
        "to":"KT1XpM1f6cq8cy8m8WV9xSsE5nBix2DzTYmx",
        "amount":0,
        "mutez":true,
        "parameter":{
            "entrypoint":"add",
            "value":{
                "args":[
                {
                    "string":"tz1dZydwVDuz6SH5jCUfCQjqV8YCQimL9GCp"
                },
                {
                    "args":[
                    {
                        "string":"tz1dZydwVDuz6SH5jCUfCQjqV8YCQimL9GCp_0"
                    },
                    {
                        "args":[
                        {
                            "int":"20"
                        },
                        {
                            "int":"1611331473"
                        }
                        ],
                        "prim":"Pair"
                    }
                    ],
                    "prim":"Pair"
                }
                ],
                "prim":"Pair"
            }
        }
    }
]
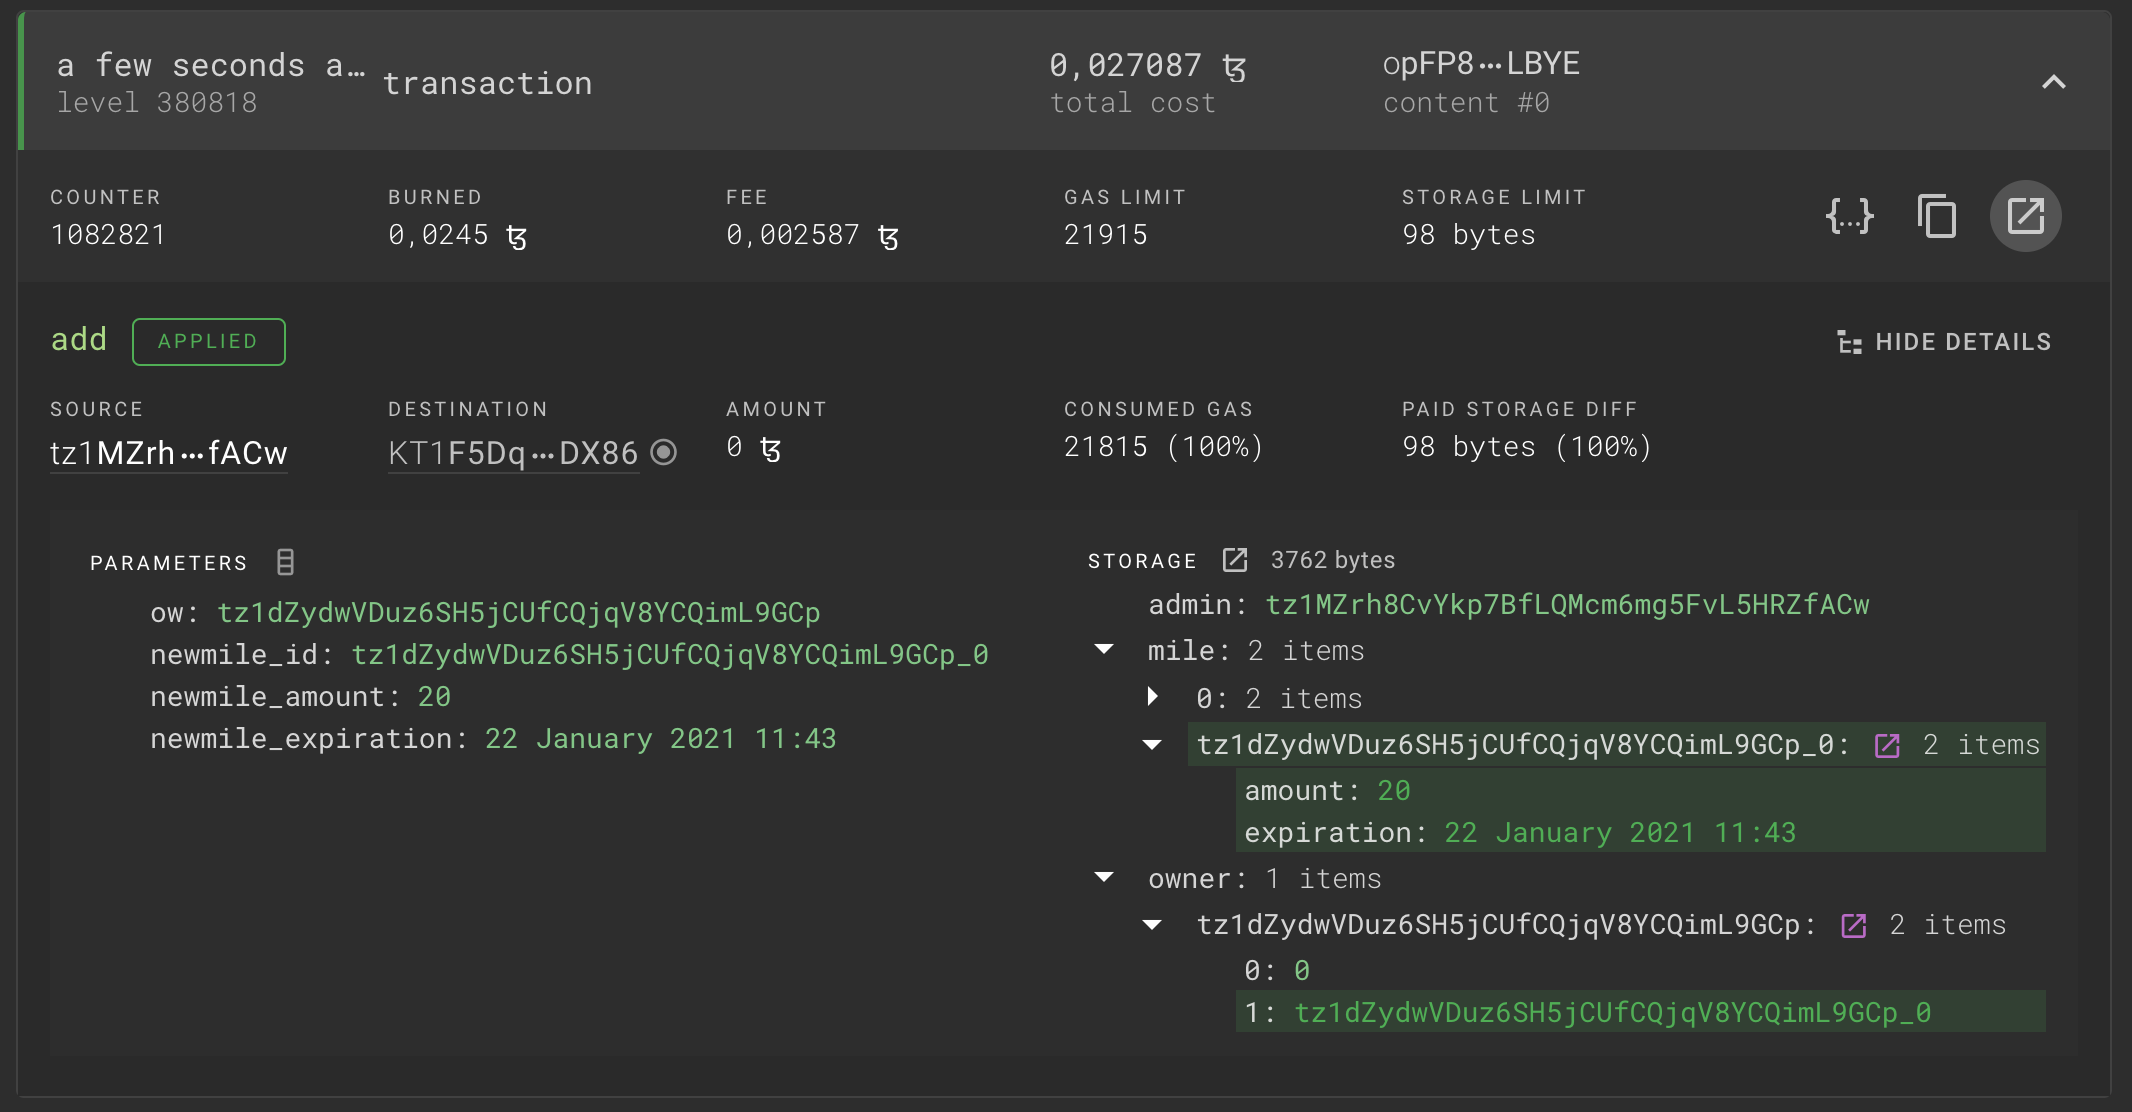
Once sent, the transaction should take a minute to be confirmed. When confirmed, you may click on the transaction to visualize the evolution of the contract storage. On the screenshot below, check create miles (highlighted in green):
Next step is to go to the user interface to spend these 20 miles on reward items!